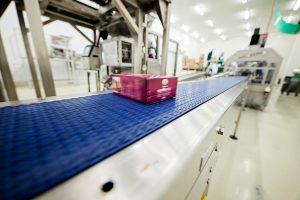
Vision inspection systems (sometimes referred to as machine vision systems) provide image-based inspection automated for your convenience for a variety of industrial and manufacturing applications. Though not a new technology, 2D and 3D machine vision systems are now commonly used for automated inspection, robot guidance, quality control and sorting, and much more.
These systems come equipped with a camera, or multiple cameras, and can also be equipped with video and lighting. They are capable of measuring parts, verifying that parts are in the correct position, and can recognize the shape of parts. Also, vision inspection systems can measure and sort parts at high speeds. With the use of computer software, images are captured during any outlined process and capture data needed. It can also be set up to be intelligent enough to make decisions that impact the function you are assessing, often in a pass/fail capacity to trigger an operator to act. They can be stand-alone units or embedded into your lines to provide a constant stream of information.
In one instance, a vision inspection system is in place that inspects the quality of film-laminated furniture board edges that must meet precise quality requirements. This particular system is set to perform fully automated inspection and ensure the highest product quality.
In many instances, manual inspection is not an option whether you are inspecting finished products or parts for products coming down an assembly line. In theory, a skilled worker can perform a visual inspection on a conveyor belt, but in reality, the human eye is easily tricked. It’s impossible to spot tiny defects, mismeasurements, or a multitude of possibilities of products rolling down an assembly line.
The use of machine vision to provide high quality inspection can help in three major categories:
Defect detection: This refers to the automatic inspection of any part looking for defects. They can be cosmetic or affect product functionality. Some defect detection examples include:
- Suture edge sharpness
- Glass vial cracks
- Particulate matter
Tolerance monitoring: A good quality system uses as much feedback as it can to keep the process in control. Machine vision inspection systems can be critical in monitoring process related tolerances and allowing the associated control systems to adjust for those trending towards boundary conditions. Typical vision tolerance monitoring systems we have implemented include:
- Temperature monitoring by way of IR heat signatures
- Final part positioning against set datums
- Punch wear cycles based on cut edge quality and shape
Component measurement: Vision systems are widely used to ensure that the components our automation is assembling are acceptable, or else they are rejected before even entering the process. Some typical measurements might be:
- Plastic molded short shot detection
- Component color check
- Tube fill levels
No two vision inspection systems are the same, therefore, no two precision lens for the systems are the same. Our highly experienced engineering staff is dedicated to providing the best solution for your needs. Along with our manufacturing department, you can trust that the lens required for your system will perform to the highest standard possible.